A dent in wood has a special talent for appearing in the exact spot your eyes visit first. Maybe a chair leg pressed into your hardwood floor, a dropped tool left a tiny crater in your tabletop, or your favorite dresser met the corner of a moving box and lost the argument. The good news? Not every dent means sanding the whole piece, calling a pro, or dramatically whispering, “Well, it had a good life.”
Learning how to remove a dent from wood is often simpler than people expect. In many cases, a dent is not missing wood; it is compressed wood. That difference matters. If the fibers are merely crushed downward, moisture and heat can help them swell back toward their original shape. The classic repair method uses a damp cloth and a household iron to create steam, which encourages the compressed wood fibers to rise. It sounds like a strange little furniture spa day, but it works surprisingly well on many small dents.
This guide explains how to remove dents from wood in 10 clear steps, including when to use steam, when to use filler, how to avoid damaging the finish, and what to do if the dent is really a gouge wearing a dent costume. Whether you are fixing wood furniture, trim, floors, cabinets, or an unfinished woodworking project, these practical steps will help you improve the surface without making the problem worse.
Before You Begin: Is It a Dent, Scratch, Gouge, or Crack?
Before grabbing the iron, pause for a quick inspection. Wood damage can look similar at first glance, but different problems need different repairs. A true dent is usually a compressed area where the wood fibers are pushed down but not cut away. A scratch is a surface mark, often lighter or darker than the surrounding finish. A gouge means wood fibers have been torn, sliced, or removed. A crack is a separation in the wood.
Steam is best for dents where the fibers are still mostly intact. It is less effective on deep gouges, chipped corners, cracked boards, or areas where the wood is missing. Think of steam as a way to re-inflate crushed fibers, not a magic wand that can regrow missing material. If the wood has been cut, broken, or splintered, you may need wood filler, epoxy filler, a touch-up marker, sanding, staining, or refinishing.
Best Candidates for the Steam Method
The steam method usually works best on raw or unfinished wood, light dents in solid wood furniture, shallow pressure marks in hardwood floors, small dents in trim, and dents made by blunt impact. Softer woods such as pine and poplar often respond quickly because they absorb moisture more readily. Dense hardwoods may need repeated applications and patience.
When to Be Careful
Be extra careful with antiques, veneers, laminate surfaces, painted wood, lacquered furniture, shellac, and glossy finishes. Heat and moisture can cloud, soften, lift, or discolor some finishes. Veneer can also loosen if too much moisture or heat reaches the glue layer. If the piece is valuable or sentimental, test in a hidden area first, or consult a furniture repair professional.
Tools and Materials You Will Need
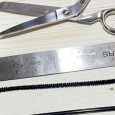
You do not need a workshop full of expensive tools to fix many wood dents. For the basic steam repair, gather a clean cotton cloth, paper towel, or shop towel; clean water; a household iron; a small dropper or spoon; fine-grit sandpaper; a clean dry cloth; and, if needed, matching stain, finish, wax stick, or wood filler. A flashlight is also useful because dents are easier to see when light hits the surface from a low angle.
Avoid dirty rags, colored towels that might bleed dye, and cloths with detergent residue. You are applying heat, and heat has a way of turning tiny mistakes into permanent decorations. Also, do not use a soaking towel on finished furniture unless you have tested first. The goal is controlled moisture, not a miniature indoor weather event.
How to Remove a Dent from Wood: 10 Steps
Step 1: Clean the Wood Surface
Start by cleaning the area around the dent. Dust, grit, wax, grease, or furniture polish can interfere with the repair and may get pushed into the wood during steaming. Wipe the surface with a soft, dry cloth. If the wood is unfinished, a lightly damp cloth is usually enough. If the wood is finished, use only a cleaner that is safe for that specific finish.
Cleaning also helps you see the real shape of the damage. Sometimes what looks like a dent is actually a combination of dirt, a scratch, and a small finish mark. Once the area is clean, you can decide whether steaming is the right move.
Step 2: Inspect the Dent Closely
Shine a flashlight across the wood at a low angle. This makes the dent easier to see and helps you judge its depth. Look for broken fibers, sharp edges, cracks, or missing wood. If the dent has fuzzy, torn, or splintered edges, steam may improve it but probably will not erase it completely.
On finished wood, check whether the finish itself is cracked. If the finish is intact, steam may struggle to reach the wood fibers underneath. If the finish is broken, steam may enter but could also cause whitening or lifting around the damaged area. That does not mean you cannot try; it means you should test carefully and use short applications.
Step 3: Test in a Hidden Spot
This step is boring, responsible, and very much worth it. Choose a hidden area, such as the underside of a table, the back of a dresser leg, or a covered section of flooring. Place a slightly damp cloth on the test spot and apply the iron briefly. Check whether the finish clouds, softens, sticks, or changes color.
If the test area reacts badly, do not continue with steam on the visible dent. Use a different repair method, such as a wax stick, touch-up marker, filler, or professional refinishing. If the test area looks fine, proceed with caution.
Step 4: Add a Small Amount of Water to the Dent
For unfinished wood, place a few drops of clean water directly into the dent and let it sit for a minute or two. The water begins to penetrate the compressed fibers. For finished wood, skip the direct water unless the finish is already broken and you are prepared to refinish the area afterward.
Use only a small amount. You are not watering a houseplant. Too much water can raise the grain over a wide area, stain the surface, loosen veneer, or create a larger repair job. Keep the moisture focused on the dent as much as possible.
Step 5: Place a Damp Cloth Over the Dent
Dampen a clean cotton cloth or folded paper towel with water. Wring it out so it is wet but not dripping. Place it directly over the dent. The cloth acts as a protective layer between the iron and the wood while also supplying moisture for steam.
On unfinished wood, you can use a fairly damp cloth. On finished wood, use less moisture and shorter contact time. If you are repairing a small dent, fold the cloth so the wet area is no larger than necessary. The smaller the wet zone, the less sanding and finish blending you may need later.
Step 6: Apply Heat with an Iron
Set the iron to a medium or medium-high setting. For unfinished wood, some woodworkers use high heat, but beginners should start lower and increase gradually. Do not use the steam burst directly on the wood. The damp cloth will create steam as the iron heats it.
Press the iron onto the cloth for a few seconds, then move it gently in small circles or lift and press again. Do not leave the iron sitting in one place for too long. Heat can scorch wood, damage finishes, or imprint the cloth texture into softened finish. You should hear or see steam. That steam is the tiny repair crew waking up the compressed fibers.
Step 7: Check the Dent and Repeat if Needed
Lift the cloth and inspect the dent. If the wood has risen but the dent is still visible, dampen the cloth again and repeat the process. Several short applications are safer than one heroic blast of heat. Deep or stubborn dents may need multiple rounds.
Stop when the dent is level or nearly level with the surrounding surface. There is a point where more steaming gives little improvement and only increases the risk of raised grain or finish damage. If the dent improves but does not disappear, let it dry fully before deciding whether to sand, fill, or touch up the area.
Step 8: Let the Wood Dry Completely
After steaming, let the wood dry completely. This may take a few hours or longer, depending on the wood, the amount of moisture used, and the room conditions. Do not rush to sand while the wood is still damp. Damp wood can gum up sandpaper and lead to uneven results.
As the wood dries, the grain may feel slightly raised. This is normal. Water swells the fibers, and even when the dent improves, the surface may need light smoothing.
Step 9: Sand Lightly with the Grain
Once the area is dry, sand lightly with fine-grit sandpaper. Always sand with the grain, not across it. For many small repairs, 220-grit sandpaper is a good choice. If the surface is rougher, you may begin with 180-grit and finish with 220-grit or higher.
Keep the sanding gentle. The goal is to smooth raised grain, not dig a shallow crater around the old dent. Feather the sanding into the surrounding area so the repair blends naturally. On finished wood, sanding may dull the finish, so you may need to apply a matching finish, wax, or polish afterward.
Step 10: Touch Up the Color and Finish
If the repair area looks lighter, duller, or slightly uneven, touch it up. For unfinished wood, apply stain that matches the project, then seal it with the appropriate finish. For finished furniture or floors, use a matching wax stick, wood marker, stain pen, or finish repair product. For painted wood, use primer if needed and repaint the area.
If the dent did not fully rise because fibers were broken or missing, apply wood filler or epoxy filler according to the product directions. Slightly overfill the damaged spot, let it dry or cure, sand it smooth, and then stain, paint, or seal it. Remember that some fillers absorb stain differently than surrounding wood, so always test color matching before applying it to the visible surface.
What If the Dent Is in a Hardwood Floor?
Hardwood floors can be repaired with the same basic principles, but there are extra concerns. Floors usually have durable finishes that resist moisture, which is great for daily life but tricky for steam repairs. If the finish is intact, steam may not reach the compressed wood. If the finish is cracked, moisture may enter and leave a cloudy or raised area.
For small floor dents, test carefully in a closet or under furniture if possible. Use a small damp cloth, brief heat, and repeated checks. After the dent rises, let the area dry and apply a compatible floor finish repair product if needed. If the floor has a deep gouge, a colored filler stick or professional board repair may be a better option.
What If the Dent Is in Finished Furniture?
Finished furniture requires a gentle approach. Steam works by moving moisture into the wood fibers, but furniture finishes are designed to keep moisture out. That is why a dent in finished furniture may not respond as dramatically as a dent in raw wood.
If you try the steam method on finished furniture, use low-to-medium heat, a barely damp cloth, and short contact times. Check constantly. If the finish turns white, sticky, cloudy, or soft, stop. Let it dry and consider a finish repair method instead. For minor dents that are mostly visual, a wax fill stick or color-matched repair marker may create a cleaner result with less risk.
Common Mistakes to Avoid
Using Too Much Water
More water does not always mean a better repair. Excess moisture can raise grain over a wide area, stain unfinished wood, or damage veneer and finish. Use enough water to create steam, but keep it controlled.
Holding the Iron Still Too Long
A hot iron can scorch wood or damage finish quickly. Keep the iron moving or use short press-and-lift motions. If the cloth starts to dry out completely, re-dampen it before continuing.
Sanding Too Aggressively
Sanding can fix raised grain, but aggressive sanding can create a visible low spot. Sand lightly and with the grain. On thin veneer, avoid sanding unless you are absolutely sure there is enough material.
Expecting Steam to Fix Missing Wood
Steam can raise compressed fibers. It cannot replace wood that has been cut away. For gouges, chips, cracks, and holes, use filler, epoxy, Dutchman patches, or other repair methods.
Wood Filler vs. Steam: Which Repair Should You Choose?
Choose steam when the dent is shallow, the wood fibers are compressed but not broken, and the surface is unfinished or safe to test. Choose wood filler when the damage includes missing wood, torn fibers, cracks, nail holes, chips, or deep gouges. Choose wax sticks or touch-up markers when the damage is mostly cosmetic and located on finished furniture or flooring.
For painted wood, filler is often easier because the repair will be hidden under paint. For stained wood, steam is attractive because it preserves the natural grain. Fillers can work well, but they may not absorb stain exactly like real wood. That difference can make a filled spot visible, especially on clear-finished furniture.
Extra Tips for Better Results
Work slowly. The best dent repairs are usually built from several small improvements rather than one dramatic move. Keep the repair area small. Use a clean cloth. Let the wood dry fully before judging the final result. If the dent is on a valuable piece, practice on scrap wood first.
If you are repairing a woodworking project before finishing, steam dents before final sanding. That way, any raised grain can be sanded smooth as part of your normal finishing process. If you are repairing a finished piece, think like a surgeon, not a demolition crew. Use the least aggressive method that can solve the problem.
Experience Notes: Real-World Lessons from Removing Wood Dents
One of the biggest lessons from removing dents from wood is that patience beats panic. The first time many people try the damp-cloth-and-iron method, they expect the dent to pop back instantly like a cartoon character after being flattened by an anvil. Sometimes it does rise quickly, especially on raw pine or poplar. Other times, the improvement is gradual. A dent may look 40 percent better after the first pass, 70 percent better after the second, and almost invisible after drying and sanding.
In real projects, the best results often happen on unfinished wood before stain or finish has been applied. For example, imagine dropping a screwdriver onto a bare tabletop panel you have just sanded. The mark looks terrible because it catches the light. Instead of sanding the entire surface down to the bottom of the dent, you add a few drops of water, cover it with a damp cloth, apply the iron in short bursts, and watch the compressed area rise. After the board dries, a light sanding with the grain makes the mark nearly disappear. That is the kind of repair that feels like discovering a secret woodworking cheat code.
Finished furniture can be more unpredictable. A small dent in a clear-coated coffee table may improve only slightly because the finish blocks moisture. If you increase the heat too much, you may trade the dent for a cloudy patch, which is not exactly a victory parade. In that situation, a wax repair stick may be better. The wax fills the shadow of the dent and blends the color without forcing moisture through the finish. The dent may still exist physically, but visually it becomes much less noticeable.
Another useful experience: do not skip drying time. Right after steaming, the surface can look raised, fuzzy, or uneven. That does not mean you failed. Let the wood settle. Once dry, the repair often looks better than it did immediately after heating. Then you can sand gently and make a fair judgment. Many DIY repairs go wrong because someone keeps adding water and heat after the dent has already improved enough.
On hardwood floors, the biggest challenge is blending the finish. A dent in oak flooring may rise with steam, but the repaired area might look dull afterward. Keeping the cloth small and the heat brief helps. For a floor in a visible area, test first and consider whether a floor repair kit is safer. Floors take daily abuse, so a perfect furniture-grade repair is not always necessary. Sometimes “much less noticeable” is a perfectly good win, especially in a house where pets, shoes, chairs, and gravity are all working full-time against perfection.
The final lesson is simple: identify the damage honestly. A dent can often be raised. A gouge needs filling. A chip may need patching. A cracked antique may need a professional. When you match the method to the problem, wood repair becomes much less mysterious. And once you successfully steam out your first dent, you may find yourself inspecting every table, shelf, and baseboard in the house like a tiny detective with an iron.
Conclusion
Removing a dent from wood is not about brute force. It is about understanding what happened to the fibers and choosing the gentlest repair that works. For many shallow dents, a damp cloth and household iron can raise compressed wood fibers and dramatically improve the surface. The key is to clean first, test carefully, use controlled moisture, apply heat in short bursts, let the wood dry, sand lightly, and touch up the finish as needed.
Steam is excellent for many dents in unfinished wood, but it is not the answer to every problem. Finished surfaces, veneer, deep gouges, cracks, and missing wood require extra caution or different repair products. Start small, check often, and remember that a nearly invisible repair is usually better than an overworked repair that announces itself from across the room.
