Note: This guide is written for educational home-improvement content and is based on common manufacturer instructions, plumbing best practices, and current DIY guidance. Always check local plumbing code and appliance requirements before installing a self-piercing saddle valve, because many plumbers prefer a tee fitting and dedicated shutoff valve for a longer-lasting connection.
A self-piercing saddle valve is one of those tiny plumbing parts that looks almost too simple to be useful. It clamps onto an existing cold-water pipe, uses a sharp needle to pierce the pipe wall, and creates a small branch water line for an appliance such as a refrigerator ice maker, furnace humidifier, evaporative cooler, or water filtration system. In other words, it is the plumbing version of sneaking through a side door instead of building a whole new entrance.
That convenience is exactly why saddle valves became popular with DIY homeowners. They are inexpensive, compact, and often included in appliance installation kits. However, they also have a reputation for leaks, reduced water flow, and code concerns in some areas. So before grabbing a screwdriver and declaring yourself the mayor of Plumbing Town, it is worth understanding how the valve works, when it makes sense, when it does not, and how to install it as carefully as possible.
This guide explains how to install a self-piercing saddle valve step by step, what tools you need, how to avoid common mistakes, and what to check after the installation. It also includes real-world experience tips at the end, because plumbing has a funny way of teaching lessons one drip at a time.
What Is a Self-Piercing Saddle Valve?
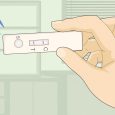
A self-piercing saddle valve is a small valve assembly that “saddles” an existing water pipe with two clamp halves. The top part contains the valve body, rubber gasket, outlet port, and piercing needle. The bottom part clamps against the pipe with screws or bolts. Once the valve is secured, turning the handle drives the needle into the pipe wall, creating a small opening for water to flow into a 1/4-inch supply tube.
Most self-piercing saddle valves are designed for low-volume water supply lines. Common examples include refrigerator ice maker lines, refrigerator water dispensers, humidifiers, and some filtration systems. They are not intended to feed major plumbing fixtures such as sinks, showers, washing machines, or dishwashers. If the appliance needs strong water flow, a saddle valve is usually the wrong tool for the job.
Before You Install: Should You Use a Saddle Valve?
Here is the honest answer: a self-piercing saddle valve is easy to install, but it is not always the best long-term plumbing solution. Many professional plumbers prefer cutting into the pipe and installing a proper tee fitting with a dedicated shutoff valve. That method usually provides better flow, better reliability, and a more code-friendly connection.
Still, saddle valves are commonly found in homes because they are fast and affordable. If local code permits them and the appliance manufacturer allows this type of connection, a saddle valve can be used for a small cold-water branch line. The key is to install it carefully, inspect it regularly, and understand that it may not be the forever solution you would choose during a full plumbing upgrade.
Use a Self-Piercing Saddle Valve Only When:
- You are connecting a low-demand appliance such as an ice maker or humidifier.
- The valve is approved for the pipe material and pipe size you have.
- Local plumbing code allows this type of connection.
- The pipe is accessible for future inspection.
- You are connecting to a cold-water line, not a hot-water line unless the product specifically allows it.
Avoid a Saddle Valve When:
- The pipe is old, corroded, thin, dented, or already leaking.
- The valve would be hidden inside a wall, ceiling, or inaccessible crawl space.
- Your local plumbing code does not allow piercing-style valves.
- You need strong water flow for a high-demand fixture.
- You are working with pipe material not listed on the valve packaging.
Tools and Materials You Will Need
Installing a self-piercing saddle valve does not require a truck full of tools, but you do need the right basics. A sloppy installation can turn a five-minute shortcut into a weekend water-feature project, and not the fancy backyard kind.
Materials
- Self-piercing saddle valve kit
- 1/4-inch outside diameter water supply tubing
- Compression nut and sleeve/ferrule
- Brass insert for plastic or polyethylene tubing, if required
- Bucket or towel
- Fine sandpaper or emery cloth
Tools
- Adjustable wrench
- Screwdriver
- Flashlight
- Tubing cutter or utility knife, depending on tubing type
- Small brush or rag for cleaning the pipe
- Safety glasses
Step 1: Choose the Right Pipe Location
Start by locating a cold-water supply pipe near the appliance. For a refrigerator ice maker, many people use a cold-water line under the kitchen sink or in the basement below the kitchen. For a humidifier, the valve is often installed on a nearby cold-water supply line close to the furnace.
Choose a straight section of pipe with enough room for the valve body, clamp, handle, and supply tubing. The area should be easy to reach because you may need to shut off the valve later. Avoid tight corners, pipe bends, soldered joints, shutoff valves, and damaged sections of pipe. A saddle valve needs a clean, smooth surface so the gasket can seal properly.
Position the valve so the handle is accessible. This sounds obvious until someone installs it facing a wall, behind a cabinet frame, or in a place where only a raccoon with a tiny wrench could reach it.
Step 2: Turn Off the Water Supply
Some saddle valve kits claim they can be installed without shutting off the water. Even so, the safer and cleaner method is to shut off the water before installation. Use the nearest local shutoff valve if available. If there is no local shutoff, turn off the main water supply to the house.
After shutting off the water, open a nearby faucet to relieve pressure in the line. This reduces the chance of surprise spraying when the pipe is pierced. Keep a towel or bucket nearby. Plumbing has a talent for finding the one place you did not protect.
Step 3: Clean the Pipe Surface
Use a rag, small brush, fine sandpaper, or emery cloth to clean the section of pipe where the saddle valve will be installed. Remove dust, grime, paint, oxidation, and rough spots. The rubber gasket needs direct contact with the pipe to create a tight seal.
Do not grind aggressively or thin the pipe wall. The goal is to clean and smooth the surface, not audition for a metalworking competition. After cleaning, wipe away any particles so the gasket sits flat.
Step 4: Back Out the Piercing Needle
Before clamping the valve to the pipe, turn the valve handle counterclockwise to retract the piercing needle fully into the valve body. This prevents the needle from scratching or piercing the pipe before the valve is properly positioned.
Check the rubber washer or gasket. It should sit under the top bracket of the saddle valve, aligned with the needle opening. If the gasket is missing, cracked, folded, or sitting crooked, stop and fix the problem before continuing. The gasket is small, but it does a big job.
Step 5: Mount the Saddle Valve on the Pipe
Place the top half of the saddle valve over the pipe with the gasket touching the cleaned pipe surface. Position the bottom clamp underneath the pipe. Insert the screws or bolts through the top bracket and into the bottom bracket.
Tighten the screws by hand first so both sides line up evenly. Then use a screwdriver to tighten each side a little at a time, alternating back and forth. This helps compress the gasket evenly against the pipe. Do not crank down one side completely before tightening the other side.
The clamp should be snug, and the gasket should compress slightly. However, do not overtighten. On softer copper tubing, excessive force can dent or crush the pipe. A saddle valve should grip the pipe firmly, not flatten it like a pancake with plumbing ambitions.
Step 6: Connect the Water Supply Tube
Most self-piercing saddle valves use a compression fitting for 1/4-inch outside diameter tubing. Slide the compression nut onto the tubing first. Then slide on the compression sleeve, also called a ferrule. If you are using plastic or polyethylene tubing, insert the small brass stiffener into the end of the tube if the kit includes one.
Push the tubing fully into the outlet port of the saddle valve. Slide the sleeve and nut into place, then thread the nut onto the valve by hand. Once it is hand-tight, use an adjustable wrench to tighten it slightly more. A common rule is snug plus about a half turn, but always follow the valve manufacturer’s instructions.
Do not overtighten the compression nut. Too much force can crush plastic tubing, deform the ferrule, or create a leak instead of preventing one. Compression fittings work by controlled pressure, not brute strength.
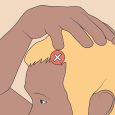
Step 7: Pierce the Pipe
With the valve mounted and the supply tube connected, slowly turn the saddle valve handle clockwise. As you turn, the needle advances and pierces the pipe wall. You may feel resistance as the needle cuts through the pipe. Keep turning until the handle stops.
At this point, the valve is usually in the closed position because the needle has been driven fully into the pipe. Do not force the handle beyond its stopping point. If it stops, it stops. Plumbing parts are not impressed by extra enthusiasm.
Step 8: Turn the Water Back On and Check for Leaks
Turn the main or local water supply back on slowly. Keep the saddle valve closed while the main supply is restored. Watch the clamp area, gasket, compression fitting, and tubing connection. Use a dry paper towel to check for moisture around the valve. Even a tiny bead of water matters.
If you see leaking around the clamp, tighten the saddle screws slightly and evenly. If the leak is at the compression fitting, tighten the compression nut a small amount. If the leak continues, shut the water off and inspect the gasket, tubing, ferrule, and valve alignment.
Step 9: Open the Saddle Valve
After checking for leaks with the valve closed, turn the handle counterclockwise to open the valve. This retracts the needle and allows water to flow through the pierced opening into the supply tube.
Let water run through the line according to the appliance instructions. For a refrigerator, this may mean flushing the water dispenser or discarding the first batches of ice. For a humidifier or filtration system, follow the manufacturer’s startup steps.
Step 10: Secure the Tubing
Route the 1/4-inch tubing carefully from the saddle valve to the appliance. Avoid sharp bends, kinks, hot surfaces, moving parts, and areas where the tube can be pinched. Leave enough slack behind a refrigerator so the appliance can be pulled forward without yanking the tube loose.
Use clips or clamps where needed to keep the tubing neat and supported. A loose water line can vibrate, rub against surfaces, or get accidentally snagged. Good tubing routing is not glamorous, but neither is discovering a leak behind the fridge three months later.
Common Mistakes to Avoid
Installing on the Wrong Pipe
Always confirm that the pipe is a cold-water supply line and that the valve is rated for the pipe material. Some valves are designed mainly for copper. Others may list compatibility with additional materials. Do not guess based on pipe color alone.
Overtightening the Clamp
A saddle valve must be tight enough to seal, but overtightening can deform the pipe. This is especially risky on soft copper. Tighten evenly and stop once the valve is secure and the gasket is compressed.
Forgetting the Tubing Insert
When using plastic tubing, a brass insert helps support the tube inside the compression fitting. Without it, the tubing can collapse slightly and leak.
Installing in a Hidden Area
A saddle valve should remain visible and reachable. If it leaks, you need to know quickly. Installing it inside a finished wall or ceiling is asking for mystery water stains and future regret.
Ignoring Local Code
Some jurisdictions discourage or restrict self-piercing saddle valves. If you are doing work that must pass inspection, or if you are unsure about local rules, use a code-approved tee and shutoff valve or hire a licensed plumber.
Better Alternatives to a Self-Piercing Saddle Valve
If you want a more durable installation, consider using a tee fitting with a dedicated shutoff valve. On copper pipe, this may involve soldering, compression fittings, or push-to-connect fittings. On PEX, it may involve a PEX tee and compatible stop valve. Under a sink, a dual-outlet angle stop may be another clean solution.
These alternatives usually require more work upfront, but they create a more professional connection. They also tend to provide better water flow, easier shutoff control, and fewer worries during a home inspection. A saddle valve is convenient; a proper tee and stop valve is often the better long-term move.
Troubleshooting After Installation
Low Water Flow
Low flow can happen if the piercing hole is too small, the needle is not fully retracted, the tubing is kinked, or debris is blocking the appliance inlet. Make sure the valve is fully open by turning the handle counterclockwise. Check the tubing route and appliance filter as well.
Leak Around the Clamp
A clamp leak usually means the gasket is not sealing evenly. Try tightening both screws slightly and evenly. If that does not work, shut off the water, remove the valve, inspect the gasket, and consider replacing the valve or repairing the pipe.
Leak at the Compression Fitting
If water appears at the tubing connection, the tubing may not be fully seated, the ferrule may be crooked, or the nut may be too loose. Shut off the water, disassemble the fitting, inspect the parts, and reconnect carefully.
Valve Will Not Shut Off Completely
If the saddle valve does not stop water flow when closed, the internal needle or seat may be worn or clogged. Because these valves are inexpensive and not always serviceable, replacement is usually the practical answer.
Maintenance Tips for a Self-Piercing Saddle Valve
After installation, inspect the valve again after a few hours, the next day, and one week later. Look for moisture, mineral buildup, corrosion, or staining below the valve. Then check it a few times per year. The sooner you catch a slow leak, the less dramatic the repair becomes.
Turn the valve gently if you need to shut it off or reopen it. Old saddle valves can become stiff, and forcing them may cause leaks. If a saddle valve is old, corroded, or attached to a pipe in poor condition, replacing it with a proper tee and stop valve is usually a smart upgrade.
Experience-Based Tips: What Real Installations Teach You
After dealing with self-piercing saddle valves in real homes, one lesson becomes clear: the installation itself is usually easy, but the decision to use one deserves more thought. Many homeowners choose a saddle valve because it feels like a shortcut. Sometimes that shortcut works fine for years. Other times, it becomes the tiny villain behind a cabinet, slowly dripping while everyone blames the dishwasher, the refrigerator, the humidity, or possibly ghosts.
The first practical experience tip is to take pipe condition seriously. A saddle valve needs a smooth, solid surface. If the copper pipe looks green, crusty, dented, or paper-thin, do not clamp a valve onto it. That pipe is already telling you it has been through enough. Installing a piercing valve on a weak pipe can turn a small project into a pipe repair. When in doubt, stop and upgrade the connection properly.
The second lesson is that accessibility matters more than people think. A valve behind a refrigerator is acceptable if you can pull the refrigerator out and reach it. A valve above a finished ceiling or buried behind a cabinet panel is not a great idea. Every water connection should be inspectable. Water leaks do not send calendar invites. They just show up and start causing trouble.
Another experience-based tip is to avoid rushing the compression fitting. Many leaks happen not at the pipe clamp, but at the small tubing connection. The tubing must be cut cleanly, pushed in fully, and supported with an insert when required. If the end of the tubing is angled, chewed up, or not seated all the way, the compression nut cannot do its job. A clean cut saves a lot of muttering later.
It is also smart to test with paper towels. After turning the water back on, wipe the valve area completely dry, then press a dry paper towel around the gasket and fitting. Even a tiny leak will show up quickly. Fingers can miss small moisture. Paper towels are brutally honest.
One underrated tip is to leave the area open for a while after installation. Do not immediately shove everything back into the cabinet or push the refrigerator tight against the wall. Let the connection sit under pressure while you check it a few times. Many small leaks reveal themselves after the valve has been pressurized for a bit.
Another real-world lesson: do not assume the included valve in an appliance kit is the best option. Kits are often designed for convenience and broad compatibility, not necessarily the most durable installation. If you own the home and want a cleaner setup, a tee fitting and dedicated shutoff valve may be worth the extra time or plumber visit. This is especially true if you are renovating, replacing old plumbing, or preparing a home for sale.
Finally, remember that plumbing rewards patience. Read the valve instructions before starting. Check the pipe size. Confirm the tubing size. Look at the gasket. Turn the handle the correct direction. Tighten evenly. Test slowly. These small steps are not exciting, but they are the difference between a quiet ice maker and a surprise puddle with dramatic lighting.
Conclusion
Installing a self-piercing saddle valve can be a straightforward way to connect a low-volume water line for an ice maker, humidifier, or similar appliance. The basic process is simple: choose a clean cold-water pipe, shut off the water, clean the pipe, mount the valve evenly, connect the tubing, pierce the pipe, restore water pressure, check for leaks, and open the valve.
However, simple does not always mean ideal. Self-piercing saddle valves are convenient, but they are also commonly criticized for leak risk, limited flow, and code concerns. If local rules allow them and the installation remains accessible, they can serve a small appliance line. For the most reliable long-term result, a properly installed tee fitting with a dedicated shutoff valve is often the better choice.
The smartest approach is to treat the saddle valve as a practical option, not a magic plumbing shortcut. Install it carefully, inspect it often, and upgrade when the situation calls for something stronger. Your floors, cabinets, and future self will appreciate the extra caution.

